With two daughters, I knew that one day I would soon become a “Dance Mom!” I mean I’m not a total fish out of the water. Back in the day, I was a tiny dancer but of course I quit before things got too serious. The demands of a 21st-century dance recital are legit. There are costume alterations, makeup application, pictures, rehearsals and the dreaded recital bun.
This is not your simple ”throw it up on your head because you didn’t have time to shower today” type of ‘do. This baby must be rock solid and ready to withstand hours of turns, twirls and tantrums if it comes to that. During recital prep a couple years ago, I threw myself into a panic trying to master the bun head. Should the hair be clean or dirty? Wet or dry? Do I use rubber bands and bobby pins or ….. All that stress has been put to good use in this Mom’s Guide To Buns below.
Clean or Dirty?
Most hair stylists agree that dirty hair works best. In fact, it actually helps to tease it a little bit and adding a bit of hairspray before you style for added texture.
Wet or Dry?
In most cases, dry hair is the easiest to style. If your child’s hair is especially fine, many have found it helpful to wet it with a few sprays of a water bottle & hairspray to glue the wispies together.
What To Use?
Tools for buns have come a long way from the sock (which is still a good option!). Go to Target or any beauty supply store and expect to find at least three different options. Popular bun helpers are:
Spin Pins: Though known best for the messy chic bun these babies make a mean recital bun if done right. I found this youtube clip that made me a believer.
The Donut Maker: I used this on my oldest who has thinner hair and it really took the stress out of bun making that first recital. Simply thread the hair (after it’s in a pony tail) through the opening of the sponge getting as close to the end of the strands as possible. Once there, roll back toward the head and fold in making a circle or bun! Voila!
Bun Net: Many little girls hair has little “spikes” that are too short to control with a bobby pin and hairspray on makes it stiff. Some have found a net beneficial to keep things in line but know these are extremely delicate and big for small heads. Try twisting it around the ponytail to hide excess material.
Bobby Pins vs Back Pins
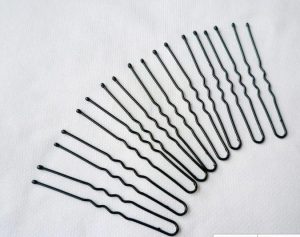
Did you know there is a difference? There is but don’t worry you need both. Bobby pins are a finishing tool to tame those flyaways. Back pins are the key to holding a bun. They are more flexible and thinner than a bobby pin. Get both–you’ll thank me later!
After trying several “bun aides”, I honestly believe the old fashioned pony tail then back pins, and finally, bobby pinning is the way to go. First, know where your teachers want the bun to be placed–at the nape of the neck or a high on the head. Pull the hair into a ponytail and secure with a rubber band. Then, begin to twist the teased hair in a circle and secure the bobby pin from the ponytail into the hair on the scalp. Pin often. Pinning in small sections as you twist into a circle will ensure that the bun stays secure. Once entire ponytail has been pinned, and a bun is visible, use more bobby pins to secure any neighboring loose hairs. Cement the hair in place with hairspray and I didn’t choose the word cement by accident!!
Practice does make perfect.
Don’t wait until the day of the recital to start practicing. Let your kiddo watch a tv show or iPad so they will be still. Don’t get frustrated or you’ll start to sweat profusely. Stay confident because whether you realize it or not–you are a Dance Mom too!


Thanks for the fab tips, we will get practicing for our big day!