


I’m totally that dorky mom who needs to put my child (…myself, my house, my dog) in a themed outfit for every holiday, no matter how minor. Fat Tuesday? Here’s your purple and green Mardi Gras romper. Columbus Day? Let’s find you a jon jon with some sailing ships, kid. I mean it- I can turn Arbor Day into a week long party.
So when March rolls around, I want it all St. Patrick’s Day, all the time.


My husband doesn’t share my “enthusiasm” for recreating my sorority socials at the smallest blip on the calendar… nor does he share his debit card. I’ve had to get creative, both financially and with fabric paint, to make sure my little one is representing from Earth Day to Flag Day. Here are a few quick, inexpensive ideas to help make sure your Minis have a pinch-free March 17th:
DIY “Bubblegum” Necklace
Materials Needed: Green baker’s twine ($1.00 at Target), Decorative ribbon ($2.00 at Joann Fabrics), Assorted gum ball beads ($3.00 for 10 on eBay)
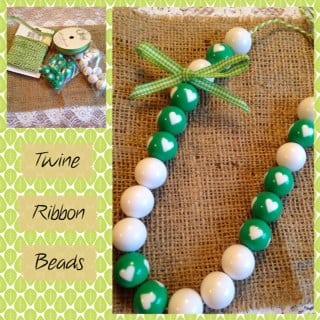
Instructions: Easiest. Craft. Ever. Cut baker’s twine to your desired length, making sure you’ll have enough left over to tie a bow once your beads are strung. String beads in the pattern of your choice, tying a small knot at each end to keep them from sliding up and down the necklace. (If small children will be wearing this, I suggest knotting the string between every bead. A definite pain in the butt- but way less pain than the Heimlich Maneuver!) Lastly, use your decorative ribbon to tie a bow between two beads on either the left or right side.
DIY Monogrammed Heatpress Onesie or T-shirt
Materials Needed: Blank green tee ($3.00 at Michaels), Iron-on glitter sheet such as Tulip ($4.99 on Amazon), Shamrock Clipart (Search Free St. Patricks Clipart online), Iron
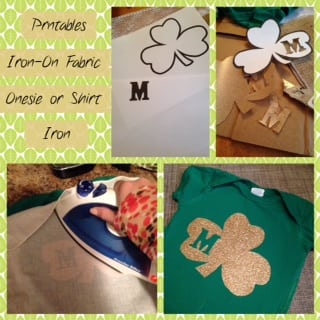
Instructions: This is going to be as hard as you make it; ours took less than 10 minutes! The design you choose is going to be the deciding factor (A shamrock will obviously take less time to cut out than a Leprechaun sitting on a pot of gold), so I suggest the simpler, the better.
First, preheat your iron to the highest/ cotton setting, making sure the steam feature is turned off. After finding your main clipart image online, search for your child’s initial(s) and print both. Cut out the shamrock, etc., and place it on top of your glitter iron on sheet to use as a template. Secure it with tape or paper clips so it won’t slide, and then cut around it.
Once you are finished, do the same with your child’s initial, cutting it out of the center of the Shamrock. Having made sure to iron out any wrinkles in the garment, position your glitter iron-on shape on the front of your tee and cover it with a pillow case.
Press the image for 20 seconds or until it feels firmly attached, then flip the garment inside out and repeat the process on the backside of the iron-on. Voila, A custom tee for their classroom St. Patty’s party!
DIY Paint Patch Leggings
Materials Needed: Blank leggings ($3.99 at Target), Green fabric paint ($1.99 at Michaels), Brush, Shamrock Clipart, Optional gold fabric marker ($3.99 at Michaels)
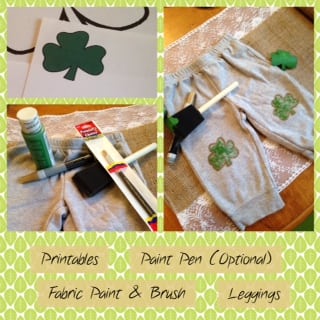
Instructions: Search for your free Shamrock Clipart. Print and cut it out. (I glued mine to some cardboard I had lying around to make it thicker, but my friend didn’t bother. It’s up to you!) For a more weathered, vintage look, paint the back of your cut-out with plenty of green fabric paint and “stamp” the design on each knee of the leggings. For a bolder shamrock, trace the cut-out with paint then fill it in. (You may want to place some cardboard or thick paper inside the legs if you go this route, so the paint doesn’t seep through). Let your design dry, and then outline it with a gold fabric marker to really make it pop. This idea makes for adorable elbow patches, too!
What easy, economical awesomeness are you making to celebrate St. Patrick’s Day with your little guys? Felt Shamrock barrettes? Green glitter foam shoelace buckles? I’ve got at least another ten years of this- don’t let me run out of ideas!


")

